Giambotte: Sausage, Chicken, Peppers, and Potatoes

This is a great dish to make on a cold night!

I found this recipe in a cookbook my mom gave me years ago.  The cookbook is Elodia Rigante’s Italian Immigrant Cookbook and it is filled with many wonderful recipes.  She also shares stories and pictures of her family throughout the book.  Many of the dishes are from her mother, whom she calls Mammanon.  She says Giambotte is from Bari, her father’s hometown in southern Italy.

Italian Immigrant CookingThe word Giambotte means mixture and is a peasant dish.  The original recipe calls for boneless chicken breasts, but I like to use bone-in pieces as they tend to stay moist when cooking.  I also add chicken stock to the recipe, which creates a delicious sauce.  If you use sweet sausage, you may want to add hot red pepper flakes to make a spicy Gambotte.  If you use hot sausage, the dish will be spicy enough.  Either way, it is a great dish to make on a cold night!

Giambotte

INGREDIENTS

1 lb sweet sausage

1 lb hot sausage

or

2 lbs of either hot or sweet sausage

4 whole boneless, skinless chicken breasts, sliced in 2 inch pieces

or

2 whole chicken breasts, bone in, skin removed, cut in half, then each half cut again

4 to 6 drumsticks

¼ cup olive oil

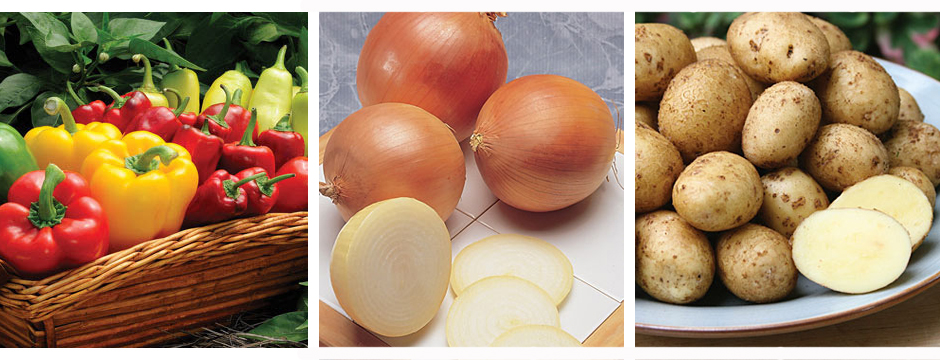
1 bag small yellow creamer potatoes, halved

1 red pepper, sliced

2 Italian green peppers, sliced

1 large onion, sliced

chicken stock (optional)

1 teaspoon oregano

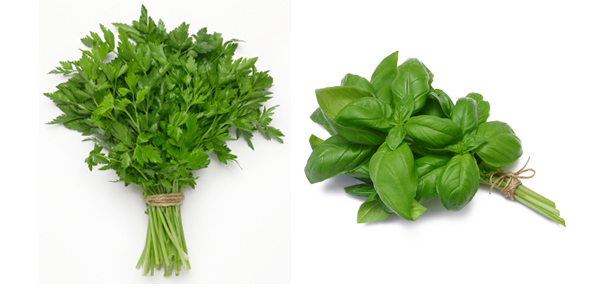
½ cup each chopped fresh basil and parsley

2 whole bay leaves

salt and pepper to taste

hot red pepper flakes (optional)

Serves 4 to 6

In a large skillet, add some of the olive oil.  Add the sausage and sauté over medium heat until browned.  Remove the sausage and set aside in bowl.

Sauté the chicken pieces in the oils from the sausage in the skillet.  Season with black pepper and cook until brown. Reduce the heat to low; add the sausage back to the skillet and simmer.

In a separate skillet, heat up some olive oil and add the peppers, onions and potatoes.  Season with salt and pepper, brown the vegetables and cook until tender.  Transfer the vegetables to the skillet with the sausage and chicken.  If using the chicken stock, add to the mixture.  Add the chopped parsley and basil, the whole bay leaves, and season with salt and pepper to taste.  Simmer until all flavors are mixed together.  For additional spiciness, add ¼ tsp of hot red pepper flakes; adjust accordingly.  Remove whole bay leaves before serving.

Serve the Giambotte with warm, crusty Italian bread and your favorite salad!


Cover images courtesy of Burpee


Cheesecake

With the holidays here, I decided to bake a dessert that I have not made in quite a while.

With the holidays here, I decided to bake a dessert that I have not made in quite a while.  Going through my old recipes, I came across this delicious cheesecake.  This year I made it for Thanksgiving and it was a big hit.  My mother got this recipe from a friend of hers years ago and handed it down to me.  This is a great recipe that can be made in a variety of ways.  I have added crushed pineapples to the cake before baking it, which is always a favorite in our house.  Or, you can serve it topped with cherries, blueberries, raspberries, or strawberries.

Photo by Lina Widjaja of Crustables.

Ingredients:

Graham Cracker Nut Crust

1 ¾ cup fine graham cracker crumbs

¼ cup  finely chopped walnuts

½ tsp cinnamon

¼ cup melted margarine or butter

Combine all ingredients in a bowl and mix with a fork until moistened.  Reserve 3 Tbsp. of mixture.  Press remaining mixture in the bottom and 2 ½ inches up sides of a greased 10”spring form pan.

Mixing the crust.  Photo by Kona Gallagher
Mixing the crust. Photo by Kona Gallagher

Cheesecake:

3     eggs

2    8 oz packages of cream cheese softened

1 cup  sugar

¼ tsp  salt

2 tsp  vanilla

1 tsp  almond extract

3 cups  sour cream

1  capful of rum or brandy (optional)

1  can of cherries or blueberries in syrup (optional)

1    can crushed pineapples, drained (optional, see note)

Combine sugar and cream cheese; beat until smooth.  Add eggs one at a time, beating well after each addition.  Add the rest of the ingredients and beat well until smooth.  Blend in sour cream.  Add the capful of rum or brandy if using.  Pour mixture into prepared graham cracker crust and top with reserved crumbs if desired.  

Note: Pineapples can be spread over the graham cracker crust before pouring in the cheesecake mixture.

Preheat the oven to 375 degrees.  Place the cheesecake into the oven and bake for 35 minutes or until set.  Oven temperatures will vary, so your cake may take longer to bake.  To test for doneness, stick a toothpick in the middle.  It will come out clean when cake is done.  The cake should still have a little wiggle in it; do not overbake.  Once the cheesecake is done, let it sit for a few hours.  Run a knife around the rim of the pan to loosen it, then undo spring form and remove.  Cool the cake in the refrigerator for at least 5 hours, or overnight, before serving.

A finished cheesecake. Photo via Wikimedia

You can serve the cheesecake as-is or top it with cherries or berries in their syrup.

Topped with cherries. Image via Ken's Oven
Topped with cherries. Image via Ken’s Oven

I hope you enjoy this most delicious dessert!

Cover image via Better Homes and Gardens

Granny’s Meatballs

Of all of my childhood memories, one of the most vivid was being at my great grandmother’s house on a Sunday and eating her delicious meatballs.

Of all of my childhood memories, one of the most vivid was being at my great grandmother’s house on a Sunday and eating her delicious meatballs.  They would be piled high in a bowl and she would have them in the oven to stay warm.  I think every one of us will tell you Granny’s meatballs were the best!

meatballs 3

Her recipe has been handed down through the generations, and while I know the recipe has changed over time, what is most important is that it represents a tradition that has remained in my family to this day.

As a child, every Wednesday we had macaroni and meatballs, which I continued when I had my own family. To this day, I will keep a dish of meatballs in the oven after I cook them.  It is the first place everyone looks when it is pasta night at our house!

pasta with sauce

I learned how to cook these morsels at a very young age and I have never measured any of the ingredients!  I have done my best to give you estimates in measuring the ingredients.

I have also included my recipe for a marinara sauce that I use for pasta.  I start my sauce with sausage, which gives it a great flavor.  Whenever possible, use fresh ingredients.

Ingredients for Sauce:

1lb of Hot Italian sausage, cut into 2 inch pieces

1lb of Sweet Italian sausage, cut into 2 inch pieces

1 large onion, chopped

1 clove garlic, chopped

1 35 oz can of crushed tomatoes

2 6 oz cans of tomato paste

Salt to taste

Pepper to taste

1 cup fresh basil, chopped

½ cup fresh parsley, chopped

¼ cup fresh oregano, chopped

½ cup of water

Olive oil

1lb of dried pasta

In a large, heavy sauce pan or Dutch oven, heat olive oil.  Place sausage in pan and brown on all sides.  Add chopped onion and garlic and cook for a few minutes till translucent.  Add water to pan with tomatoes and tomato paste.  Fill one of the small and the large can with water, scraping any tomatoes from the can and add to pot, less water will give you a thicker sauce.  Add the salt, pepper, basil, parsley and oregano. Bring to a boil, then simmer for 1 1/2 to 2 hours.
Ingredients for Meatballs:

1 ½ lb of ground beef, veal, and pork (ground beef can be used alone if preferred)

2 eggs

½ cup grated Locatelli Romano cheese (adjust if needed)

4 to 5 slices white bread or Italian bread, ground in a food processor  (do not pulse into crumbs I like to keep them a little coarse)

Salt, to taste

Pepper, to taste

1 clove of garlic, or to taste

1 cup fresh parsley

½ cup fresh basil

¼ cup of water (or less)

Crisco oil

Place the ground meat mixture and eggs in a bowl.  Chop the parsley, basil, and garlic in a food processor and add to mixture.  Grind the bread in food processor and place in bowl.  Add the Romano cheese and season mixture with salt and pepper. Add some of the water and mix together; if needed, you can add more bread.  You do not want the mixture to get too soft or it will be hard to roll into meatballs.

In a large frying pan, add enough Crisco oil to cover the bottom of the pan.  If you like, you can use olive oil, though I feel olive oil makes the meatballs get too soggy.  Make sure the oil is hot as this will make a difference in how they cook.  Roll the meatballs with your hands, and place into hot oil.  Cook the meatballs until they are crusty, then turn.  If you do not want them to be crusty on the outside, you can turn them earlier.  Cook the meatballs until they browned all over and cooked through.

With a slotted spoon remove the meatballs from the frying pan.  If you want to, place a few meatballs in a bowl to keep warm in the oven until ready to serve.  Place the remaining meatballs in the marinara sauce until ready to serve.

Just before serving, cook your favorite pasta as directed and drain.  Use a slotted spoon to remove the sausage and meatballs from the sauce and place in a separate bowl to serve.  Ladle some of the marinara sauce into the bottom of a large pasta bowl, add the pasta and additional marinara sauce, and toss the pasta to coat.  Serve with the meatballs, sausage, grated Locatelli Romano cheese, crusty Italian bread, and a salad.

I hope you enjoy this meal as much as we have throughout the years!


Rack of Lamb with Mint Pesto

This recipe updates the classic combination of mint and lamb by creating an easy pesto to season the meat.

I came across this recipe for Rack of Lamb with Mint Pesto a few years back in Williams-Sonoma Essentials of Grilling, a must-have cookbook with many delicious recipes to choose from.  

essentials-of-grilling-williams-sonoma-8010l3

This dish was a definite hit with my family.  The recipe updates the classic combination of mint and lamb by creating an easy pesto to season the meat.  Coated with a final layer of breadcrumbs, the lamb develops a toasty, incredibly flavorful crust.  The pesto is made with mint that I grow in my garden, so it is nice and fresh.  For the lamb, I use a New Zealand rack of lamb, which is smaller, and I prefer to use panko breadcrumbs.

rack of lamb 2

Rack of Lamb with Mint Pesto Crust

Rack of Lamb with Mint Pesto

Ingredients:

For Mint Pesto:

1 cup lightly packed fresh mint leaves

2/3  cup lightly packed fresh parsley sprigs

¼ cup pine nuts

3 cloves garlic, freshly chopped (optional)

1 tsp grated lemon zest

1 tbsp fresh lemon juice

salt

pepper

¼ tsp red pepper flakes

1/3 cup extra virgin olive oil

½ cup grated Parmesan cheese

For the Lamb:

2 ½ cups panko or coarse dry bead crumbs

2 racks of lamb, 1 ¼ – 1 ½ lb each

Makes 4 to 5 Servings

To make the mint pesto, combine the mint, parsley, pine nuts, garlic (if using), lemon zest and juice, ½ teaspoon salt, ½ teaspoon pepper, and red pepper flakes in a food processor.  Pulse until all ingredients are finely chopped, then process, stopping to scrape down the sides of the work bowl once or twice, until a coarse puree forms.  With the motor running, pour in the olive oil and process until it is well-blended, 5- 10 seconds. Transfer to a bowl and stir in the cheese. Let the pesto stand at room temperature for 15 minutes, or cover and refrigerate for up to 24 hours before using.

Spread the breadcrumbs on a large plate. Smear the pesto over the lamb rack, covering all sides, then dredge the lamb in the crumbs to cover the pesto coating. Pat extra bread crumbs onto any areas that are not coated.

Place lamb racks on their sides on a grill rack away from the heat elements. Cover the grill and cook, turning the racks over once until nicely browned and crusty, 12 to15 minutes per side for medium rare, or until done to your liking.

To test for doneness, insert an instant-read thermometer into the thickest part of the rack away from the bone.  It should register 130 degrees.  The temperature will rise another 5-10 degrees while resting.

Transfer the lamb racks to a cutting board, cover loosely with aluminum foil, and let rest for 5 minutes.  Cut the racks into chops.  Serve with your favorite vegetable and salad.  Enjoy!

Lobster and Shrimp Salad

Last week I wanted to make a light and simple meal and, not being able to find just the right recipe, I decided to make a dish using lobster and shrimp

I am always looking for new recipes for easy meals, especially in the summer.  Last week I wanted to make a light and simple meal and, not being able to find just the right recipe, I decided to make a dish using lobster and shrimp.  I put together a Lobster and Shrimp Salad that tasted amazing!  When placed on a bed of lettuce, it is a perfect summer dish for lunch or dinner, ideal on those days when it is just too steamy for a warm meal.

lobster salad

To make this dish, I used lobster meat and shrimp that were already cooked.  You can certainly cook the seafood yourself, either just before making the salad or up to a day in advance.  Keep in mind that if you buy raw seafood, you will need more than the following recipe calls for.  The amount of each seafood can also be adjusted to your taste; for example,  I prefer more lobster than shrimp.

The olives I use are from Whole Food, though you can use any that you prefer.  Using fresh herbs, whether you pick them from your own garden or buy them, will always give your recipes more flavor.  I strongly recommend using fresh herbs whenever possible!

olivesbasil and parsley

Lobster and Shrimp Salad

Serves 2 (or 4 as a side dish)

Ingredients:

1lb lobster tails, cooked

½ lb large shrimp, cooked

½ cup pitted Mt Athos green olives with Sicilian herbs, cut into quarters

½ cup pitted black olives with Herbs de Provence, cut in half

½ cup olive oil

¼  tsp coarse ground black pepper

½ cup finely chopped fresh basil and parsley (total, adjust to taste)

1 tbsp fresh lemon juice

 romaine lettuce leaves, optional

Whisk together olive oil, lemon juice, black pepper, basil and parsley.  Set aside.

Cut lobster tails and shrimp into small chunks and place in a medium bowl.  Add olives to seafood, then pour on the olive oil mixture and toss to coat evenly.

Place salad over a bed of romaine lettuce and serve as a main course, or use as a side dish to compliment your favorite fish.

Enjoy!

Mixed Seafood Grill with Anchoiade

Cooking on the grill is a favorite summer activity!

Cooking on the grill is a favorite summer activity!  There are so many different meals you can make on the grill.  Williams-Sonoma has a Guide to Grilling on their website that can help even an amateur grill cook create a delicious meal.  They also offer a wide assortment of grilling essentials that you will need to get started and their rubs, spices, and sauces are a compliment to many dishes.

Williams-Sonoma Grilling Baskets
Grilling baskets make it easier to grill a variety of foods.
Williams-Sonoma Barbeque Sauce
A few sauces available from Williams-Sonoma.

Williams-Sonoma cookbooks are phenomenal; I have an assortment of them, and one in particular that I highly recommend is Essentials of Grilling.  It has a wide range of recipes that can take you through the summer without repeating meals!

Essentials of Grilling

One recipe we enjoy is from the Williams-Sonoma Seafood Cookbook.  It is so easy to make, and a perfect dish for a hot summer night. 

Williams Sonoma Seafood
Williams-Sonoma Seafood

I have changed the original recipe to include shellfish and seafood varieties that we enjoy.  I also marinate the seafood with an olive oil mixture before grilling.  I love the Anchoaide sauce with this dish!  This Provencal dipping sauce made with anchovies is the perfect complement to the seafood. 

Grilled Seafood
Mixed Seafood Grill with Anchoiade


Mixed Seafood Grill with Anchoiade

1 whole lobster,  1 ½ lb or 2 frozen lobster tails, thawed

1 lb sea scallops

1 lb jumbo shrimp

2 doz little neck clams, cleaned

1 lb mussels, cleaned

1 lb firm fleshed fish fillets such as tuna, salmon, or swordfish (optional)

12 large oysters, cleaned (optional)

 ½ to ¾ cup Olive Oil

Course black pepper, to taste

 ½ cup chopped Basil

 ½ cup chopped Parsley

 ¼ tsp red pepper flakes

Italian Seasoning to taste

Thick slices French or Italian bread, grilled and brushed on one side with olive oil.

Anchoiade:

In a blender, combine ½ cup extra virgin olive oil, 2 cloves of garlic (optional), 4 oil-packed anchovies, ¼ cup parsley, and 1 tbsp lemon juice and puree until smooth.  Pour into a bowl and add ground pepper to taste.  You may need to adjust the amounts used according to how much seafood you grill.

Prepare a grill for grilling over medium high heat.  Make the anchoiade and set aside.

Prepare the seafood.  If using lobster tails, cut them in half down the center and remove  the vein.  Place on a platter with cleaned clams, mussels, and oysters, if using.  Wash and pat dry scallops.  Shrimp can be shelled and deveined, or you can grill with shells on.  Cut fish fillets into large pieces and place all on platter.

For the marinade, combine the olive oil, pepper, chopped parsley and basil, red pepper flakes and Italian Seasoning.   Whisk ingredients together and spoon over the seafood, turning to coating all of the fish and shellfish but reserving some marinade for garnish.  You may have to adjust the measurements of the olive oil mixture depending on amount of seafood.  Let sit until ready to grill, up to 30 minutes.

I prefer to grill the shrimp, scallops, and fish on a grill grid, but you can place them on skewers to cook as well.  If you use wood skewers, soak them in water for at least an hour before grilling to prevent them from burning.

Place a grill basket on the grill and line it with tin foil.  Place the marinated clams in the basket and add mussels and oysters after 15 minutes, or when the clams start to open.  Keep the foil in the basket folded closed while grilling. When clams and mussels begin to open, unfold foil.  Discard any clams, mussels, or oysters that do not open.

Meanwhile, grill the lobster tails, turning until shells are bright red and flesh becomes creamy white.  If using a whole lobster, plan on needing about 30 minutes grill time. Grill shrimp until evenly pink and scallops until they are opaque and lightly browned.  Grill fish, turning till flesh is opaque and easy to flake.

I place any seafood that is done in the grill basket with the clams and turn the heat down while I wait for the rest to finish cooking.

Transfer all of the fish and shellfish to a warmed platter and drizzle with the remaining olive oil mixture.  Garnish with lemons and serve immediately with the grilled bread and individual bowls of the anchoiade.

Serve with a salad of your choice and enjoy this delicious meal!

Risotto

Risotto is an Italian dish that developed in the regions between the Alps and Tuscany, and is now appreciated all over the world.

Years ago I found an article on risotto, which described step by step how to prepare this delicious dish.  Risotto is an Italian dish that developed in the regions between the Alps and Tuscany, and is now appreciated all over the world.

The type of rice best suited for cooking a good risotto is the Carnaroli, but Vialone Nano and Arborio are good choices as well.  Depending on the ingredients used, risotto can be a first course, a complete meal, or a dessert.  It can easily be prepared in about 30 minutes.

Carnaroli Rice
Vialone Nano Rice
Arborio Rice

The base for a risotto is made using one of the three types of rice mentioned above, oil or butter, and a battulo, which is an ingredient used t0 flavor a recipe and can include chopped onion, garlic, celery and/or carrot.  You also need a cooking liquid and one or more types of cheese.

With this base you can make many different risotto dishes depending on your choice of ingredients such as beef, chicken or pork, fish or seafood, vegetables, legumes, or truffles.

Making a risotto is as easy as following six simple steps.  I like to make risotto with seafood.  The following recipe also includes one of my favorite vegetables, asparagus.

Risotto with Shrimp and Asparagus

Risotto with Shrimp and Asparagus

1 1/2 cups of rice
1 lb of large shrimp, peeled and deveined
1 onion, finely chopped
1 cup white wine
4 cups seafood stock
1 bunch of asparagus
1/2  cup finely chopped basil and parsley
2 tbsp butter
1/4 cup Parmigiano Reggiano cheese
salt and pepper to taste

Prepare the shrimp by removing the shell and deveining, if necessary.  Rinse under cold water, pat dry, and set aside.

Set a few asparagus stalks aside to use as a garnish.  Cut the rest of the asparagus into 1-inch pieces on the diagonal, discarding the bottoms.  Steam all of the asparagus for 5 minutes, then place under cold water to stop cooking.  Pat dry and set aside.

Place the seafood stock in a saucepan and heat, keeping it warm while you begin the risotto.

In a deep skillet, warm the olive oil.  Add the onion (which is the battulo in this recipe) and sauté till translucent.

Add the rice and toast for 3 minutes .

Deglaze the pan with the wine and cook until the liquid evaporates.  Add the warmed stock in 1/2 cup increments, allowing each addition to be absorbed before adding more.  Continue to cook, stirring, until the rice is tender and creamy, about 20 minutes in total.

Add the shrimp and cook till pink.  Add the cut asparagus.

Add finishing ingredients, including the butter, cheese, basil, and parsley.  Season with salt and pepper.  Stir well to combine.  Place the few whole asparagus on top of the dish with some parsley sprigs for garnish.

Serve this dish with your favorite crusty bread and a salad.  Enjoy!

Women Chefs

If my daughters were to pursue cooking as a career, they would certainly have some impressive role models to follow.

Everyone who knows me knows I don’t cook.  I wish I had the time for it!  My mom and grandma are amazing home chefs though.  They take risks and are willing to try new things.  I appreciate the craft of cooking well and hope my children follow in their grandmother’s footsteps when it comes to preparing food rather than mine!

If my daughters were to pursue cooking as a career, they would certainly have some impressive role models to follow.  The world of professional cooking is still a male-dominated place, but thanks to women like Julia Child who paved the way for others, many female chefs have become household names and even celebrities in their own right.  Three I really enjoy are Lidia Bastianich, Giada de Laurentiis, and Ina Garten, better known as Barefoot Contessa.

Lidia Bastianich is so much more than a famous television chef.  She is a woman who turned her passion for food into a thriving entertainment business.  She is the author of several cookbooks and founder of Tavola Productions, an entertainment company that produces great broadcast productions.  Along with her son Joe, also a well known chef, Mario Batali, and Oscar Farinetti, Lidia opened Eataly, one of my favorite NYC spots.  She teaches culinary classes and has her own line of high quality kitchen products as well as Nonna’s Foods, a platform which allows her to distribute her own food products.  As if all that must not keep her busy enough, Lidia also produces award-winning wines at Bastianich Vineyard in Friuli and La Mozza Vineyard in Maremma, Italy.  The sheer amount of drive Lidia must have to accomplish so much from her love of good food is so inspiring!

Lidia Bastianich
Lidia’s recipe for Sole Meuniere.
Lidia’s Favorite Recipes, one of the author’s most popular cookbooks.

I’m also a big fan of Giada de Laurentiis.  My mom often uses Giada’s recipes and I think the appeal lies in her simple, easy-to-follow techniques for preparing amazing food.  She really helps you feel like you can prepare something fantastic without a lot of complicated steps.  Giada was born in Rome and grew up in a family that placed great importance on time in the kitchen.  Her grandfather was a film producer as well as a restaurant owner, so perhaps Giada was destined to become a popular television chef.  She was professionally trained at Cordon Bleu in Paris and eventually started her own catering company.  She was “discovered” by a Food Network executive who read an article in Food and Wine Magazine about the de Laurentiis family in 2002.  Her show “Everyday Italian” earned an Emmy and turned Giada into one of the most recognizable chefs in America today.  She has also authored several cookbooks and has her own line of cookware.  Giada’s enthusiasm for the food she prepares is infectious!

Giada de Laurentiis
Giada’s recipe for Spaghetti with Swiss Chard and Pecorino Cheese.
Everyday Italian by Giada de Laurentiis

Ina Garten, better known as Barefoot Contessa, is another noteworthy woman of the culinary world.  Unlike most well known cooks, Ina never trained to be a professional chef.  In fact, she used to work in the White House Office of Management and Budget but felt the desire to do something more creative.  One day, she read about a specialty food store for sale in the Hamptons, drove out to see it, and on a whim made the owners an offer she didn’t expect them to accept.  They did accept, and Ina began the career that eventually led to her becoming a household name.  After 18 successful years with her Barefoot Contessa food store, Ina sold the place to two employees and set about writing her first cookbook.  It was a hit that she followed up with several more cookbooks before earning her own Food Network show.  I think Ina Garten’s popularity with home cooks comes from her healthy approach to real food, using whole, fresh ingredients rather than anything artificial.  She has a talent for making everything she prepares look delicious and simple.  She also has a beautiful blog where she shares recipes and experiences.  If you can’t travel the world to experience great food, Ina’s blog is the next best thing!

Ina Garten, also known as Barefoot Contessa
Greek Panzanella Salad recipe by Ina Garten
Barefoot Contessa Cookbook

Whatever my girls decide to pursue in life, I hope they go after it with the same drive, passion, and creativity as these three talented chefs!

Truffle Salt from Olive That and More

Not long ago, Jessica, my project manager, discovered a store in Montclair, New Jersey called Olive That and More.

Not long ago, Jessica, my project manager, discovered a store in Montclair, New Jersey called Olive That and More.  Specializing in olive oils, balsamic vinegars, and sea salts from around the world, Olive That and More is a foodie’s dream come true, but the store’s cleverly designed interior is the icing on the cake.  With shelves and other components from the location’s previous tenant (a garden store) along with custom light fixtures created by the owner, Olive That exudes a rustic and welcoming atmosphere that encourages shoppers to taste, sample, and learn about all of the incredible products on display.

The staff at Olive That are very helpful and more than willing to answer any questions about their products or offer suggestions for cooking, serving, or buying gifts.  In addition, the store hosts events such as tastings and sometimes partners with local chefs for special dinner events.  Even their Facebook page is a great resource for recipes and ideas!

When you walk into Olive That, you immediately notice how many of the products are available for tasting.  There are bowls of bread for sampling different oils and vinegars as well as salt shakers that allow you to taste different salts before purchasing.  One of the more unique items available at Olive That is truffle salt.  Jessica seems to have become addicted to the stuff, even keeping some on her desk at work to sprinkle over her lunch or add to a bowl a popcorn!

You may be thinking, “What is truffle salt?”  The description from Olive That sums it up perfectly:  All-natural Fusion Black Truffle Salt combines the distinct taste of black truffles with pure sea salt crystals to create an uncommonly delicious flavoring.  A creative chef’s dream, black truffle salt adds a hint of earthy, mushroomy flavor to beef, eggs, potatoes and pasta.

Truffle salt is used as a finishing touch or garnish for cooked food, not an ingredient to add while cooking.  It has an intense, strong flavor that truffle lovers are sure to appreciate!  It’s lovely when sprinkled on vegetable soup or seafood; just keep in mind that a little goes a long way!  Olive That offers two “strengths” of truffle salt:  their original version as well as a stronger truffle salt.  These salts are stored in large containers, and when the staff refills the smaller bottles of salt, the aroma fills the entire store!

I hope you have the opportunity to visit Olive That soon to experience their amazing products and learn from their knowledgeable staff!


Heart Healthy Foods

By eating a variety of foods, including fresh fruit, vegetables, whole grains, fish, nuts and more, you are getting the different nutrients which are needed to protect your heart and blood vessels.

February is American Heart Month.  Keeping this in mind, I went to the Web MD website with a list of the 25 Top Heart Healthy Foods.  These foods are loaded with heart healthy nutrients that help protect your cardiovascular system.  By eating a variety of foods, including fresh fruit, vegetables, whole grains, fish, nuts and more, you are getting the different nutrients which are needed to protect your heart and
blood vessels.  I am very conscious of the meals I prepare and the ingredients I use in those meals.  I buy fresh herbs, produce, and vegetables and use olive oil when I cook.  We eat fish more than once a week and eat plenty of fresh fruit, so I am definitely into eating healthy.

I decided to highlight a few of the foods they recommended in the Web MD article.  It would be well worth your time to read the entire article.  You might be surprised to see that many of the foods are ones you probably already eat regularly!

Tuna is a good source of Omega-3s.
Asparagus has B-complex vitamins and heart protective antioxidants.
Carrots are a top cholesterol fighting food and may help control blood sugar levels and reduce the risk of developing diabetes.
Walnuts: a small handful a day may lower your cholesterol and reduce inflammation of the arteries of the heart.
Oatmeal can help your heart by lowering LDL, the bad cholesterol.
Blueberries have an extensive list of nutrients that support heart health.

I have a great recipe featuring a popular heart-healthy food.  This tuna dish is a favorite in our house, especially when my husband returns from an offshore fishing trip with fresh tuna.  The original recipe is from a Williams Sonoma cookbook titled “Essentials of Grilling,” a great book to have!  I have changed it some to suit our tastes, of course, and I hope you enjoy it!

Tuna with Wasabi Creme

Tuna with Wasabi Creme

Ingredients
Soy sauce, less sodium preferred
½ cup White Sesame seeds
½ cup Black Sesame seeds
4 Ahi Tuna Steaks, 6oz each, 1 inch thick

Wasabi Creme
1 cup crème fraiche
2 tsp. wasabi powder, or to taste
Chopped chives for garnish

In a shallow dish, add the soy sauce.  On a piece of wax paper, mix the white and black sesame seeds.  Dredge each piece of tuna in the mixture, then place in soy sauce, turning to coat.  Add any left over sesame seeds to tuna, cover, and refrigerate for 1 to 2 hrs.

To make wasabi crème, in a small bowl stir together the crème fraiche and wasabi powder.  Cover and refrigerate until ready to serve.  Add chives just before serving.

Grill your fish, turning once, until it is seared on the outside and rare on the inside,  3-5 minutes per side. If you prefer your tuna cooked through, leave it on the grill for 1 – 2 minutes longer per side. You can also cook the fish in a heavy skillet on high heat.

Transfer the tuna steaks to warm individual plates.  Garnish the wasabi crème with the chives, and pass at the table.

Serve with grilled or lightly steamed asparagus, dressed with an olive oil and herb mixture of chopped basil, parsley, and black pepper.  Enjoy!